Implementing UTM tracking in Webflow can be challenging, particularly for individuals without coding experience.
Imagine a simple method for capturing UTM parameters in Webflow, with no coding required.
Discover the features of Leadsources.io!
Leadsources is a tool that monitors lead sources, acting as an intermediary between your UTM parameters and Webflow.
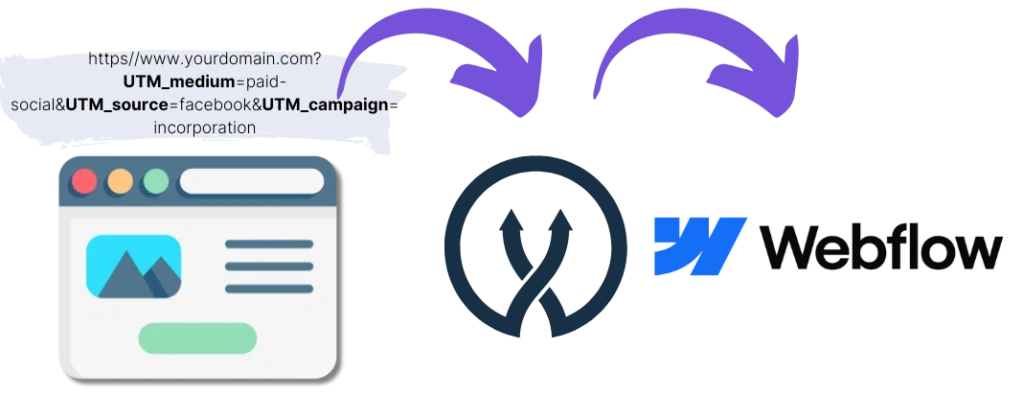
When a visitor engages with your marketing campaign, Leadsources captures the UTM parameters from the URL.
Leadsources subsequently inserts these UTM parameters automatically into the hidden fields of your Webflow.
You can then access your UTM parameters alongside the lead’s details on the Webflow submission page.
Discover how to set up UTM tracking in Webflow with Leadsources in just 10 minutes using this simple guide, with no coding required.
Implement Webflow UTM tracking in 4 simple steps
Step 1: Add Leadsources to your website’s head tag

Sign up for Leadsources.io and enjoy a 14-day free trial.
Simply insert the Leadsources code into the head tag of your website, no coding or developers required.
Just follow this step-by-step guide.
Step 2: Add UTM parameters to your campaigns

Ensure that the UTM parameters you wish to track are included in all of your campaigns, including PPC, email, social media, and more.
Leadsources is compatible with the following UTM parameters:
- UTM_source
- UTM_campaign
- UTM_term
- UTM_content
In addition to UTM parameters, Leadsources also captures other valuable information, including the channel, landing page, and landing page subfolder.
Step 3: Add hidden fields to your Webflow
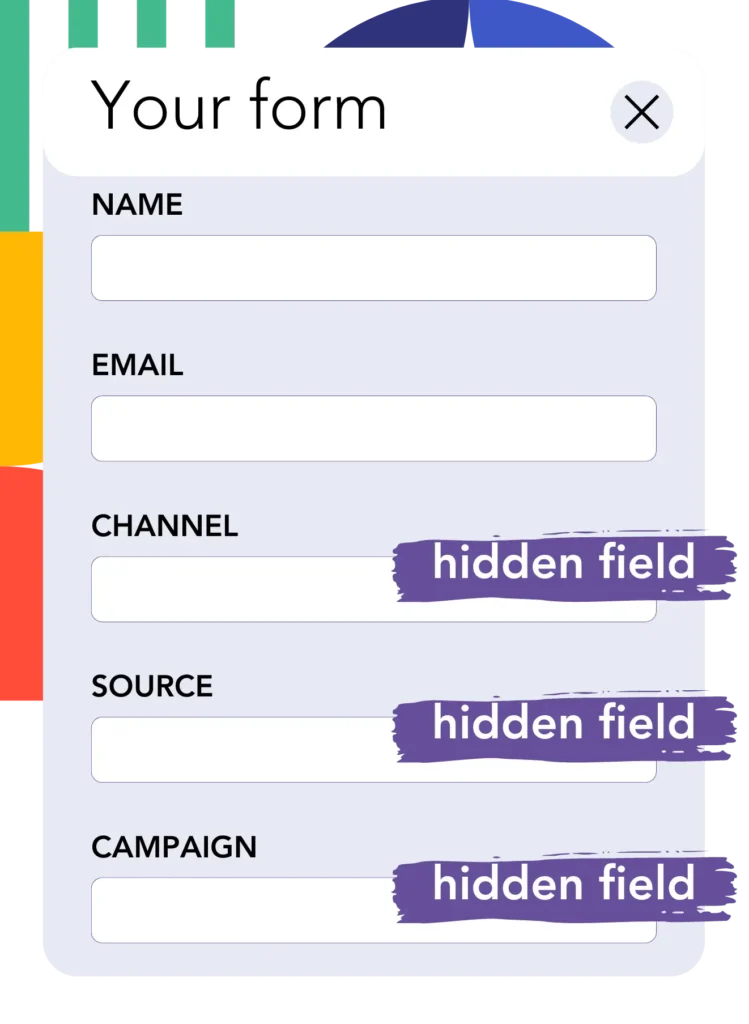
When visitors complete your Webflow, they enter personal information in the visible fields, such as their name, email, and more.
Simultaneously, Leadsources.io automatically populates the hidden fields of your Webflow with UTM parameters such as channel, source, and more.
To achieve this, simply add the hidden fields to your Webflow by following the instructions in this guide.
Step 4: Track the UTM parameters in Webflow
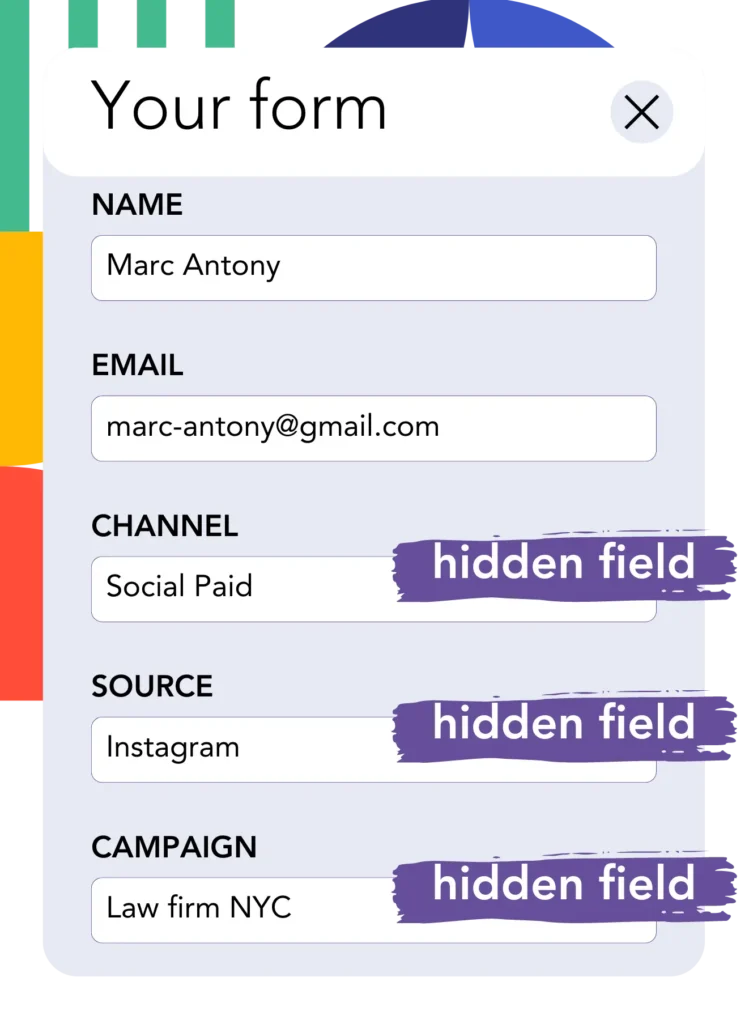
When a visitor clicks on your campaign and navigates to your website, Leadsources captures the UTM parameters from the URL.
The visitor then accesses your Webflow and begins completing it.
Leadsources automatically inserts the UTM parameters into the hidden fields of your Webflow, which remain invisible to the visitor.
Upon form submission, both the UTM parameters and the form responses are sent together.
How does Leadsources work?
By placing the Leadsources code in the head tag of your website, it captures the UTM parameters from your URL whenever a visitor accesses your site.
The UTM parameters are then stored in the hidden fields of your Webflow.
Even if a visitor arrives at your site without clicking a link containing UTM parameters, Leadsources captures data about the visitor via the referrer, such as:
- Channel
- Source
- Campaign
- Landing page
- Landing page subfolder
By using this method, you can track important lead source metrics without requiring UTM tags, such as:
- On Google Search
- On your Instagram bio link
- On your social media posts
While many tools track lead sources solely through UTM parameters, Leadsources enables you to track leads regardless of their source, whether UTM parameters are present or not, including:
- Organic Search
- Paid Search
- Organic Social
- Paid Social
- Referral
- Affiliate
- Display Advertising
- Direct Traffic
This allows you to gather all your lead source data in one centralized location.
Pro tip:
LeadSources integrates with all the popular online form builders, including Cognito Forms, Gravity Forms, Jotform, Typeform, WPForms, and more. Check how to track the UTM parameters in any form builder.
How to run performance reports
By capturing your lead source data in the hidden fields of your Webflow, you can generate performance reports such as:
- Leads per channel
- Revenue per channel
- Revenue per keyword
This enables you to make data-driven decisions regarding your marketing budget.
Let’s explore the different types of reports you can generate.
Lead performance reports
You can generate reports that display the number of leads generated by:
- Channel
- Source
- Campaign
- Landing page
- Landing page subfolder
Example #1
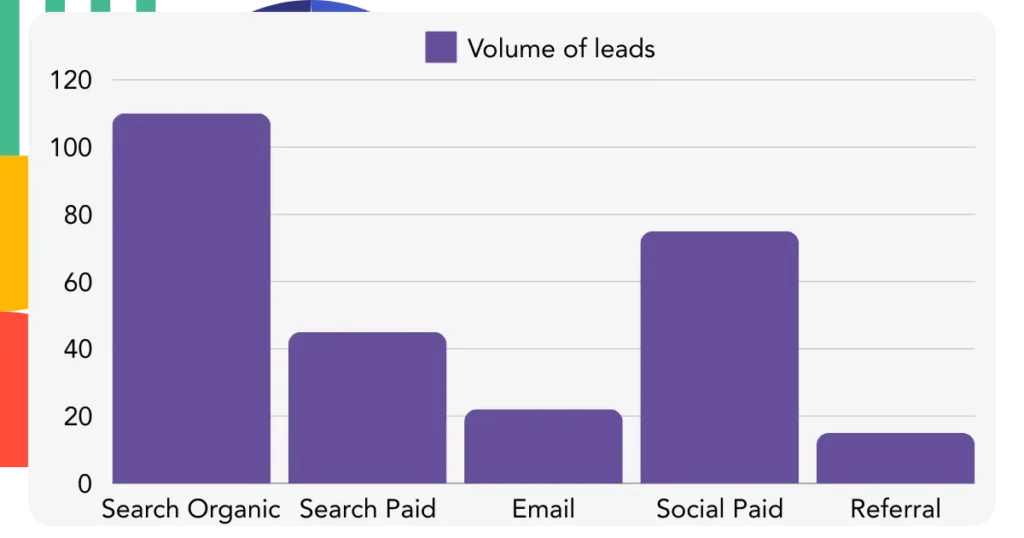
With campaigns running across various channels (SEO, PPC, email, etc.), you can export the collected data to generate a “Leads by Channel” report.
Example #2
After identifying the channel that generates the most leads (e.g., Google Ads), you can further analyze it to determine the number of leads produced by each individual ad campaign.
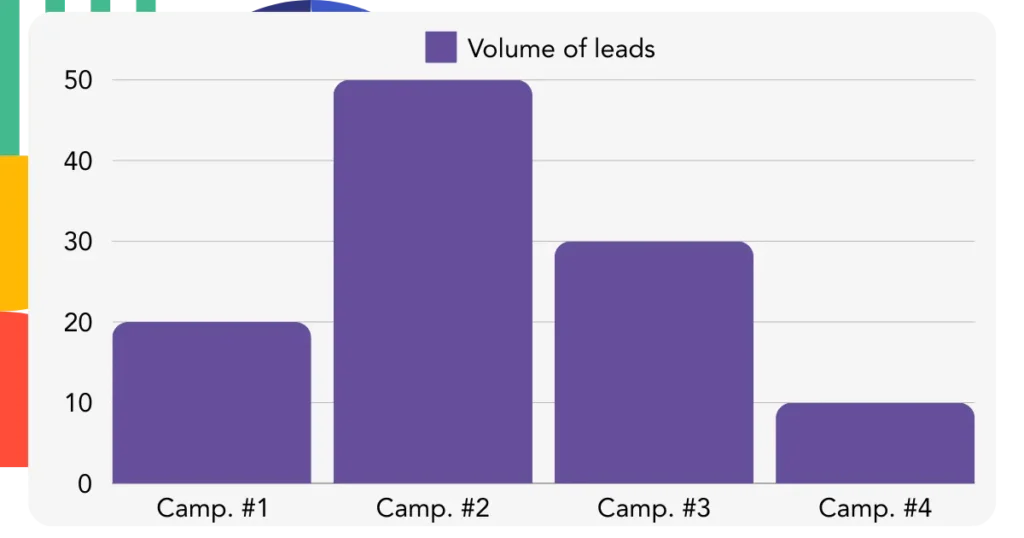
Example #3
After identifying the most effective campaign for generating leads, you can dive deeper by isolating it and examining the keywords that are driving those leads.
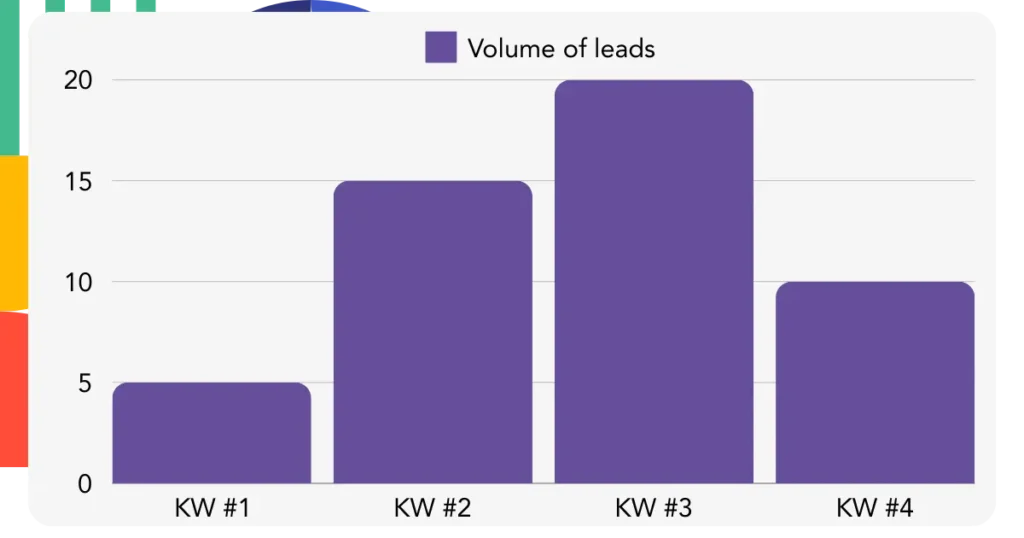
Sales performance report
You’ve determined the ads and keywords that generate the most leads, but are you aware if these leads are converting into revenue?
Using a CRM to import your Webflow submissions and create reports that connect leads to sales.
For example:
| Channels | Search Paid | Social Paid |
| Leads | 50 | 75 |
| Sales | 5 | 6 |
| Average order value | $150 | $100 |
| Revenue | $750 | $600 |
After running ads on Google and Facebook, your initial report indicated that Social Paid ads generated more leads than Search Paid ads.
However, after a few weeks of analyzing which leads converted into customers, you discovered that Search Paid ads generated higher revenue per lead. As a result, you decided to allocate more budget to Search Paid ads.
LeadSources tracks the source of each lead on Webflow, whether they come from ads, organic search, social, email, etc. and syncs that data with each submission. See the full breakdown on the lead source in Webflow page.
