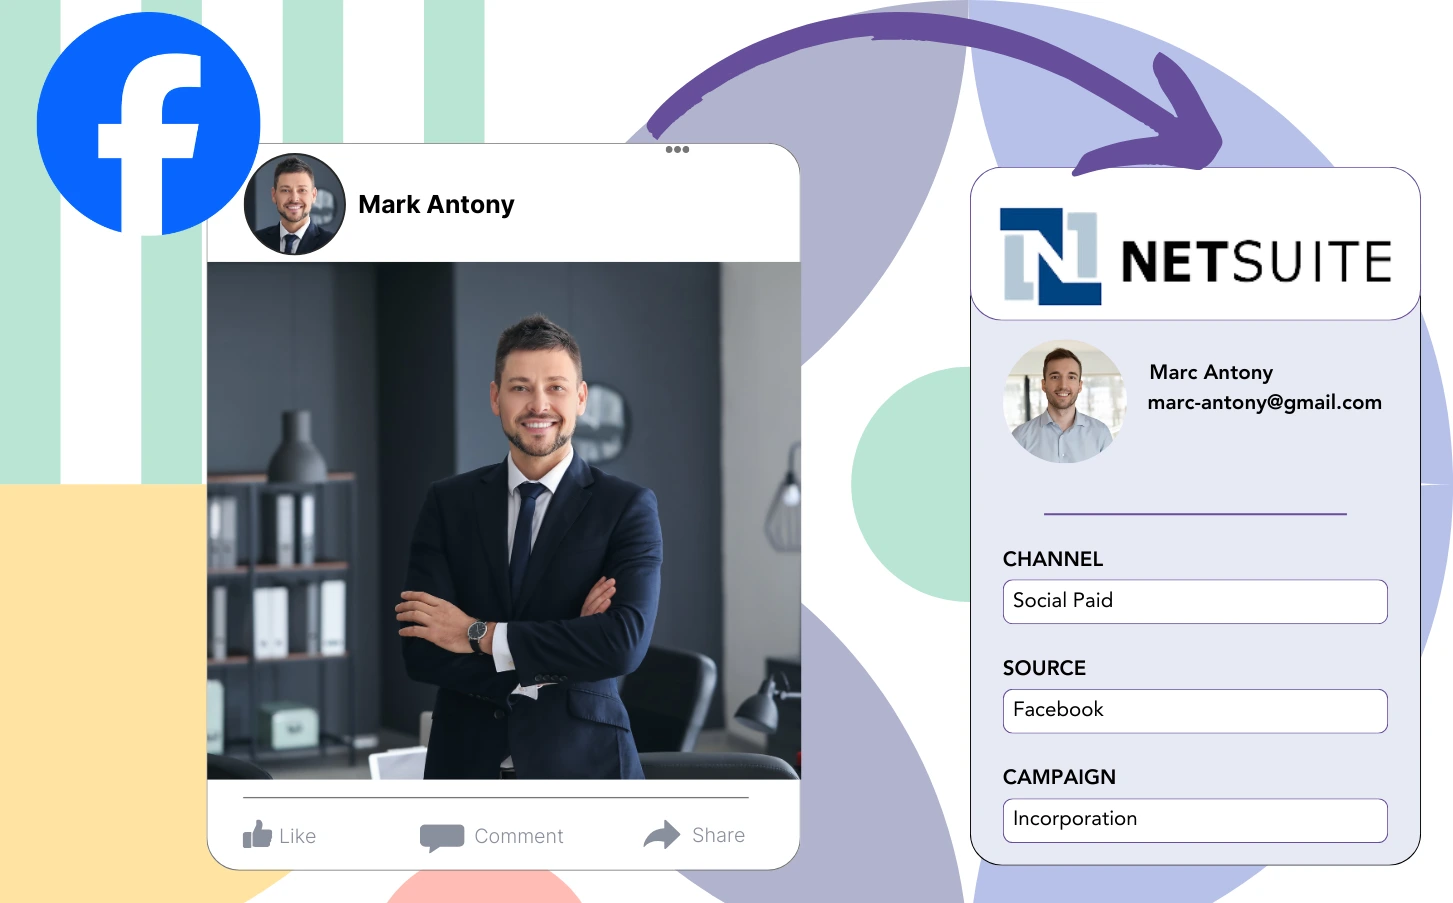
You are running lead gen ads on Facebook and moving your leads to NetSuite CRM, but you cannot figure out which Facebook ad brought in each lead, leaving you clueless about which ad was responsible for the sale once the lead becomes a customer.
Without this data, you’re unable to improve your Facebook ads, meaning you spend on various ads at the same time and remain unsure which one is responsible for the revenue.
By mapping each lead to its associated Facebook ad, as well as the campaign, ad set, audience, and ad, Leadsource solves this problem.
You’ll learn in this article how to properly match each lead to its Facebook ad, as well as its campaign, ad set, and audience.
Let’s dive into this!
Capture Facebook ads in NetSuite CRM
Step 1: Add Leadsources in the head tag of your website

Sign up to Leadsources.io, and benefit from our 14-day free trial.
Add the Leadsources tracking code in the head tag of your site – follow this easy step-by-step guide.
Step 2: Add the UTM parameters to your Facebook ads campaigns

Insert the UTM parameters you want to evaluate into your Facebook campaigns.
To give you an example, the following UTM parameters can help you track the campaign, ad set, audience, and ad:
- UTM_source=facebook
- UTM_campaign=campaign-name
- UTM_term=ad-set-name
- UTM_content=ad-name
Leadsources gathers every detail of lead source data channel, landing page, and subfolder without requiring UTM parameters, ensuring full lead-level insight.
Step 3: Add the hidden fields in your form
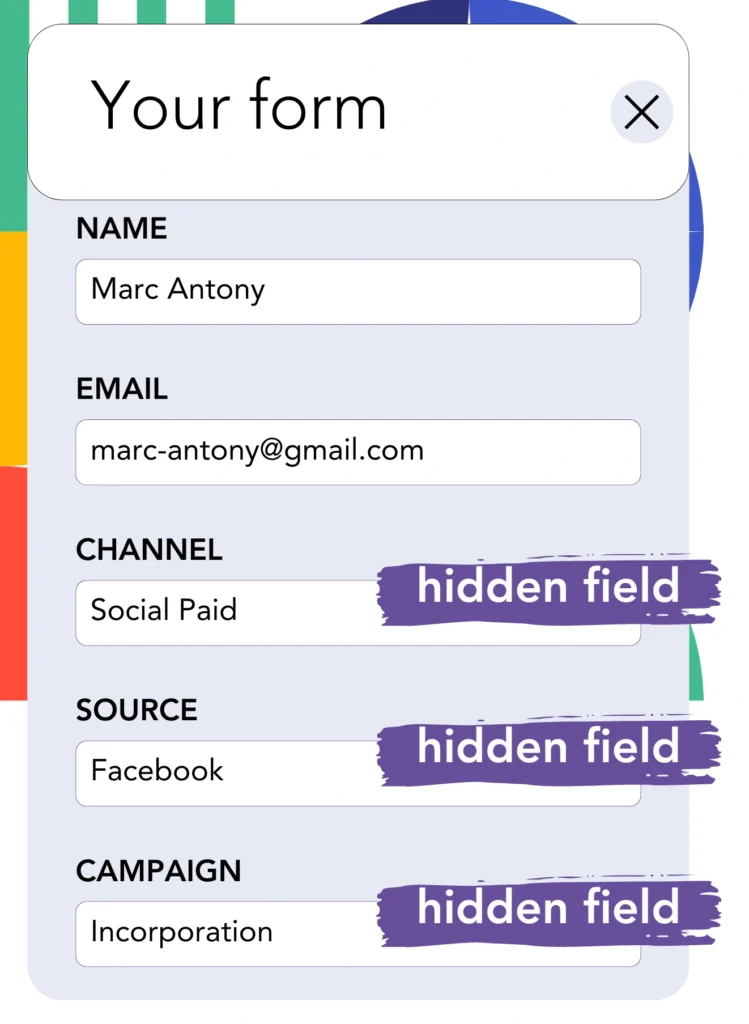
To allow Leadsources to effectively store lead source data, you need to create hidden fields in your landing page form.
When your form receives a new lead submission, Leadsources automatically fills the hidden fields with the Facebook ads data.
Consult our extensive guide for guidance on adding hidden fields to your form to wrap up the setup.
Step 4: Capture the Facebook ads data in NetSuite CRM
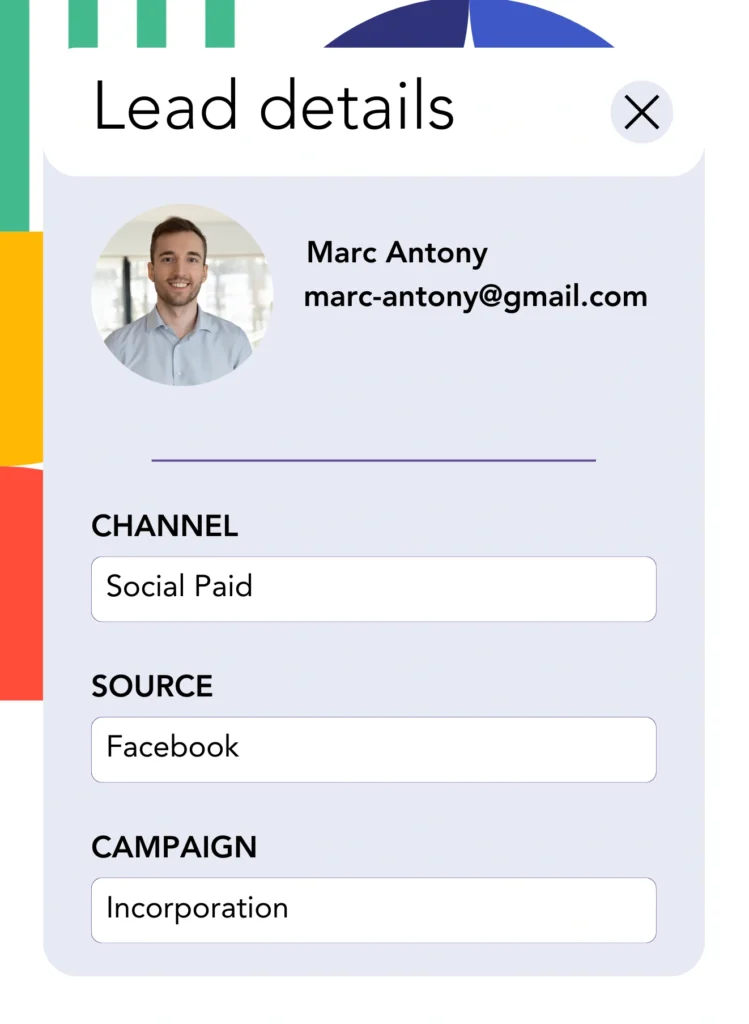
When someone clicks on your Facebook ads and lands on your page, Leadsources automatically collects the Facebook ads data, such as campaign, ad, ad set, and audience.
Thanks to Leadsources, the hidden fields in your form are automatically filled with data from Facebook ads.
Upon the form’s submission, you can automatically transfer the Facebook ads data alongside your leads to NetSuite CRM. To achieve this, simply connect your form to NetSuite CRM.
How does Leadsources work?
When you add the tracking code for Leadsources to your site’s head tag, it captures Facebook ads data, including campaign, ad set, audience, and ad, for every site visitor.
After capture, the Facebook ads data is kept in your form’s hidden fields. This information can then be transmitted to your NetSuite CRM along with the lead.
This is the data that Leadsources collects from visitors:
- Channel
- Source
- Campaign
- Content
- Term
- Landing page
- Landing page subfolder
Leadsources effectively monitors this lead source data without needing UTM parameters.
Certain situations prevent the use of UTM parameters:
- Google Search
- Instagram bio link
- Social media posts
- Etc.
Most lead source tracking tools find this problematic because they only utilize UTM parameters to collect lead source data. However, Leadsources can still track some lead source data even when UTM parameters are not usable:
- Channel
- Source
- Landing page
- Landing page subfolder
This is why Leadsources is recognized for providing extensive lead data tracking across all channels:
- Organic Search
- Paid Search
- Organic Social
- Paid Social
- Referral
- Affiliate
- Display Advertising
- Direct Traffic
Leadsources takes care of channel categorization automatically, resulting in an organized dataset.
With Leadsources, you can integrate effective lead source tracking across various channels into a single platform.
How to run performance reports
With the tracking of Facebook ads data in NetSuite CRM, you can develop a range of performance reports, such as:
- Leads by channel
- Leads by campaign
- Leads by ad set
- Leads by audience
- Leads by ad
- Leads by landing page
- Leads by landing page subfolder
This allows for a more precise assessment and modification of your Facebook ads budget.
Now, let’s highlight the different reports you can make.
Lead performance reports
These reports show how many leads were created by:
- Channel
- Campaign
- Ad set
- Audience
- Ad
- Landing page
- Landing page subfolder
Example #1
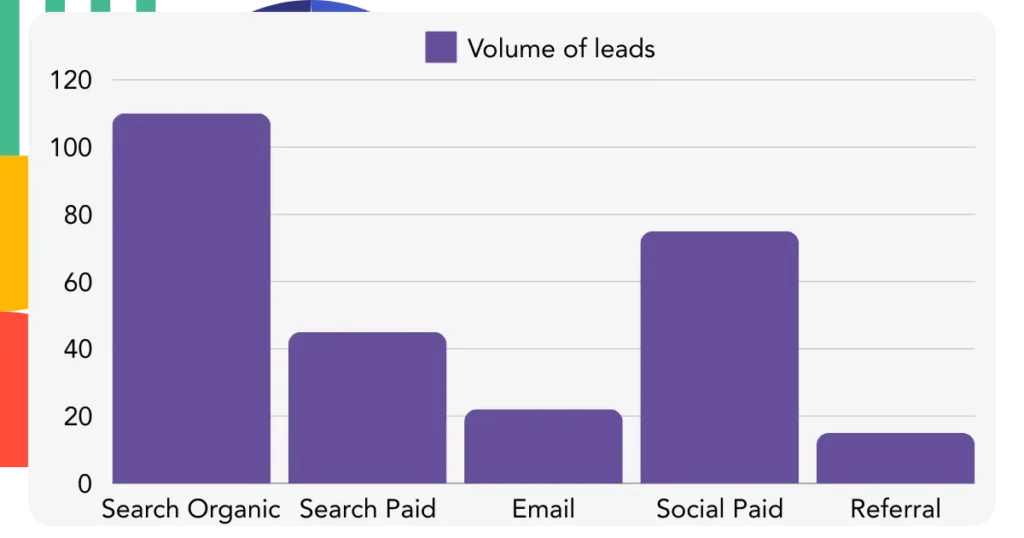
Extract data from different channels, such as SEO, PPC, and email, to produce a report named “Leads by Channel.”
Example #2
Once you find out which channel works best, like Facebook ads, you can concentrate on it to see the number of leads from all campaigns.
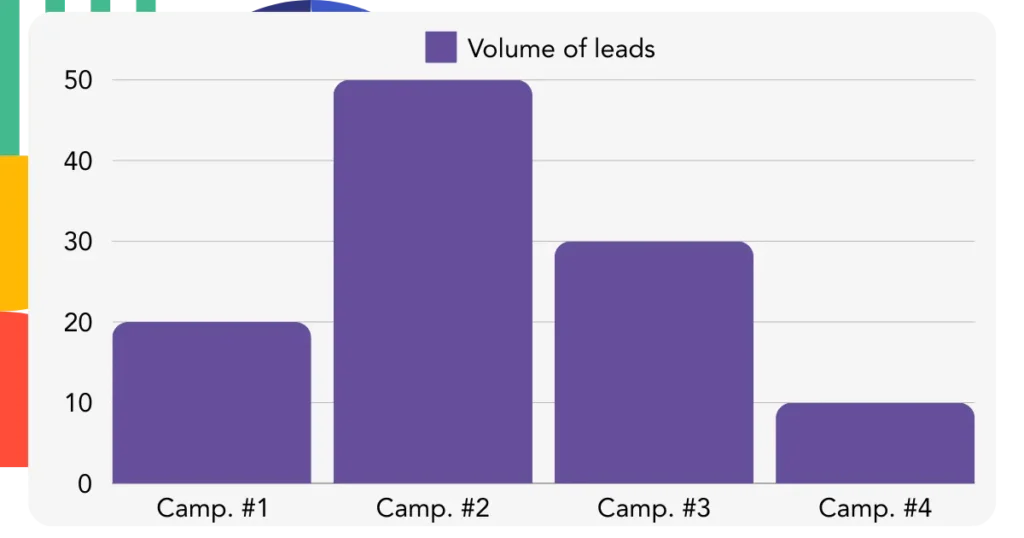
Example #3
When you establish which campaign produces the most leads, you can look into the specific audience, ad set, or ad tied to those leads.
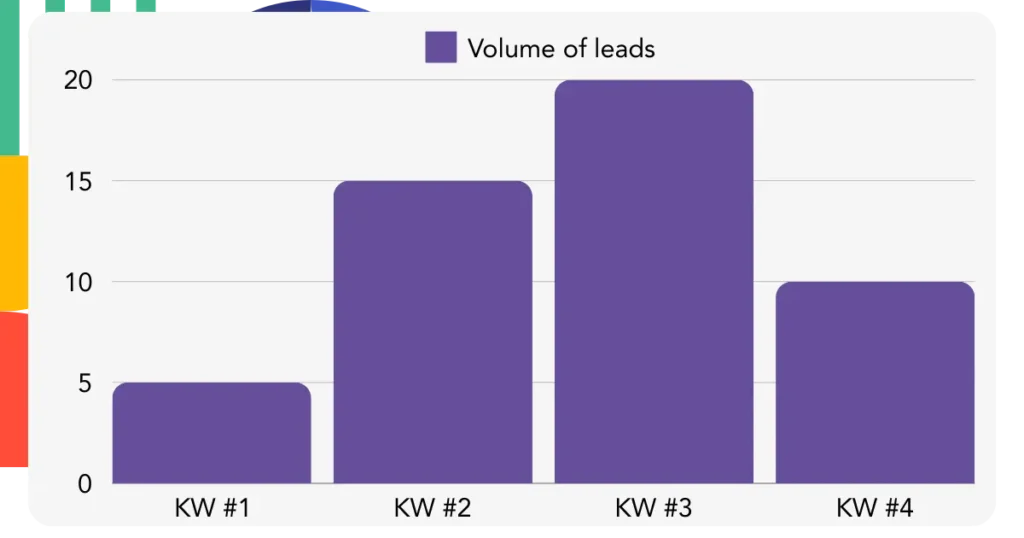
Sales performance report
It’s important to discover which ads and keywords yield the most leads, but do they have an impact on your revenue?
Sending your form data to NetSuite CRM aids in generating comprehensive analyses of sales performance.
Example:
| Channels | Search Paid | Social Paid |
| Leads | 50 | 75 |
| Sales | 5 | 6 |
| Average order value | $150 | $100 |
| Revenue | $750 | $600 |
Following your performance analysis of Google and Facebook ads, you found that Social Paid ads brought in more leads than Search Paid ads.
After conducting a few weeks of analysis, you find that the Search Paid channel generated higher revenue with fewer leads than the Social Paid channel, influencing your decision to increase funding for Search Paid campaigns.
LeadSources tracks the source of each lead in NetSuite CRM, whether they come from ads, organic search, social, email, etc. and syncs that data with each submission. See the full breakdown on the lead source in NetSuite CRM page.

